
Gmail smtp not working
Gmail smtp not working? Here’s a simple quick fix (updated 2021)
Date 10th June, 2021
Have you come to a point that you have tried everything you know, still gmail smtp not working properly or not working at all? Don’t worry. It happens to even best of us.
Here is a good news. It can be fixed in just a few minutes. When we do WordPress support services for our clients, we always do the gmail smtp settings from the scratch as it would only take a minute.
However, if you are trying to figure out where you went wrong with smtp gmail settings, it may take ages to nail it down. If you just follow the steps outlined here, you can do all the gmail smtp gettings and keep your email up and running in a few minutes.
Let’s get the ball rolling.
Why Gmail SMTP not working? And why Gmail SMTP settings?
First of all, gmail smtp is a reliable way to send emails from your WordPress website. If you are like me, you would have been receiving thousands of emails in the spam folder.
Have you ever wondered how those emails been labeled as spam. Because the server it uses to send emails would have been reported as spam, if you share the same server to send your emails your emails would have been tagged as spam as well.
However, if you use gmail smtp which is spam-free, there is literally a zero chance that your email would go to your customers spam folder.
First, let’s take a look at how to send email in WordPress using the Gmail SMTP server.
How to send email in WordPress using the Gmail SMTP server?
As I mentioned, SMTP or Simple Mail Transfer Protocol is the industry standard for sending emails and since it uses proper authentication, it increases your email deliverability.
Basically, using Gmail SMTP server keeps your emails from going to spam.
To use the Gmail SMTP server you can either use it with your free gmail account like say yourname@gmail.com or you can use the Gsuite paid plan where you get your own email address with your domain name like say Yourname@mysite.com.
You will want to decide which way you want to go but everything else in this tutorial will be the same whether you have the free or the paid version.
Step 1. Install WP mail SMTP:
To get things set up on your website, we will be installing a plugin called WP mail SMTP plugin.
To do that let’s head over to our WordPress dashboard, we will go down to plugins area and click add new. In the search box, let’s type in WP mail SMTP, this is the one we want by WPForms.

So, let’s click install now. Once you install it, you will also want to make sure you activate it.
Step 2. WP mail SMTP Settings:
Once it is activated, you can see settings as shown below or you can always get to it by going to Settings –> WP mail SMTP.
Let’s look at each field.
From Email:
In the From Email field, you might want to add your email address that is set up with your gmail account.
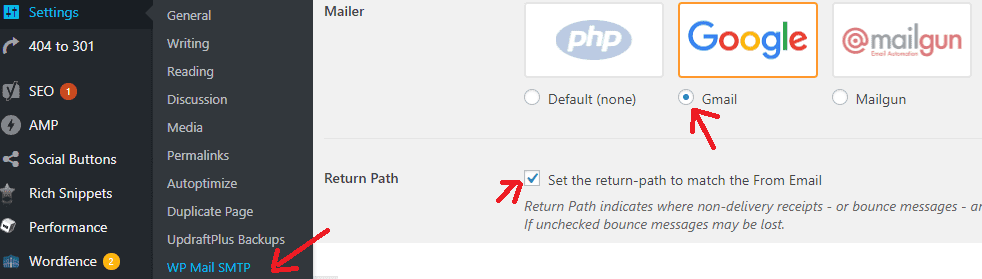
Mailer:
You also want to select Gmail under Mailer since we are using Gmail.
Return Path:
You want to hit the Set the return path to match the from email check box.
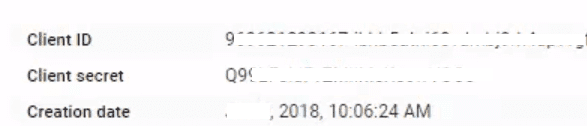
Client ID and Client Secret:
If you scroll down, you would see Client Id and Client secret fields. This is unique for every account and obviously, we need to fill out this Client ID and Client secret information here. So, let’s look at how to get it.
Step 3. Get client ID and Client Secret for gmail smtp settings:
To get the client ID and client secret, we need to create a project in the Google developers console area at https://console.developers.google.com/.
So, we will open up a new tab.
i) Create a new project:
If you haven’t created any projects then you will have a button here saying Create Project.
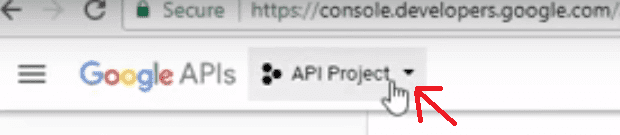
Otherwise, you can go up here and click the plus button to create a new project.

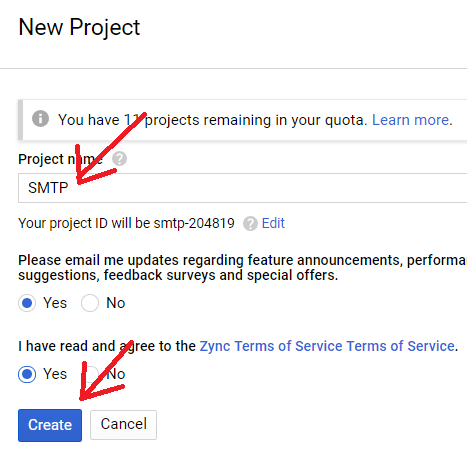
Type in the Project name as per wish. Here I typed SMTP just for the sake of this tutorial and click Create.
If you want any email updates about feature announcements, you can select the Yes radio button else select No. And for I have read and agree to the Terms of Service field, you have to select Yes as shown here.
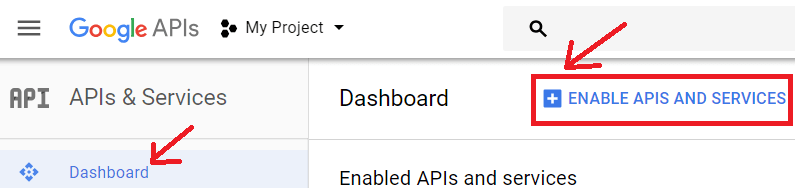
ii) Enable APIS and Services
Now we need to enable the API and services. So, you may want to scroll down and look for the Enable APIs and Get Credentials like Keys as shown in the picture here. It would be under Dashboard.
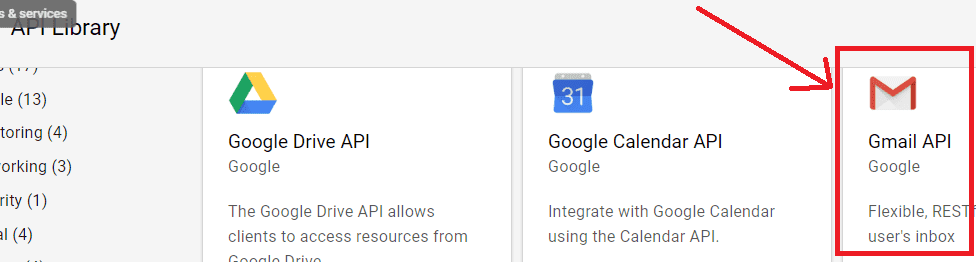
iii) Enable Gmail API
Next, under Library, which would be right below Dashboard, you would see three different APIs here. Out of three, you want to enable the Gmail API, so let’s click that here and click Enable.
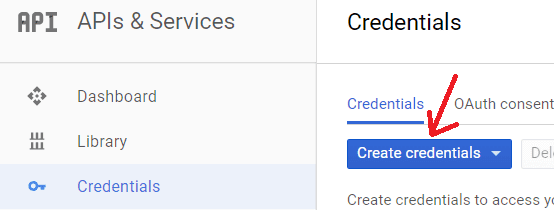
iii) Create Credentials
Here comes the best part, we need to create credentials for this Gmail API. So, click on the button that says Create Credentials under Credentials tab and it will open a drop-down screen, you have to select oAuth Client ID.
In the next window, you want to select Web Application under Application Type.
Let’s see what to enter in each of these fields.
Name:
You just have to give this a name. You can give any name here. For this tutorial, I just entered Web Client 2.
Authorized JavaScript origins:
You have to enter your full website address under Authorized JavaScript origins with https or http://www in the front. For example, if you own a website called example.com, you have to enter https://www.example.com here.
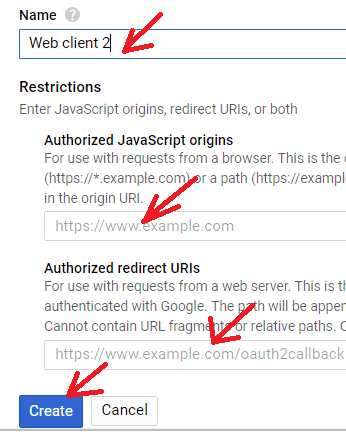
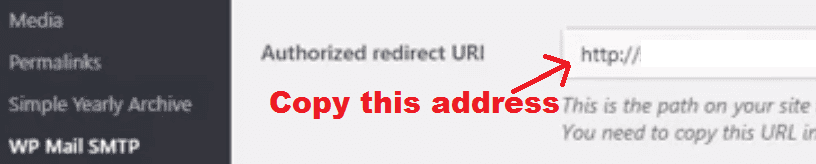
Authorized redirect URIs:
And for this authorized redirect URIs we need to go back over to our WordPress dashboard, settings –> WP Mail SMTP, look for a field Authorized redirect URI and copy the information shown in the screenshot here.
Next, go back over, right-click in the Authorized redirect URIs in Google developer window above and paste the copied address.
Now that we’ve done all that.
Let’s click Create button.
iii) Paste the Client ID and Client Secret into WordPress
Now to setup the OAuth consent screen, you need to add the email address that will be used and add the product name that will be shown to users.
This is usually just for your information. Once we’re done with that, let’s click Continue.
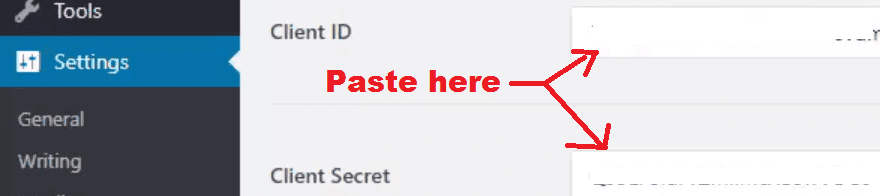
Once you click Continue, you will be able to see the client ID and client secret there. You can copy your client ID and client secret, head back over to your WordPress dashboard –> Settings –> WP Mail SMTP, and paste the client ID and client secret to those correponding fields there.
Now that we are good as far as the Client ID and client secret are concerned.
And while copying the Client secret, please make sure that you only copy the data and not any accidental extra spaces.
iv) Allow the plugin to send emails using your google account
After you save the WP Mail SMTP settings, you may want to scroll down and click the button that says Allow the plugin to send emails using your Google account.
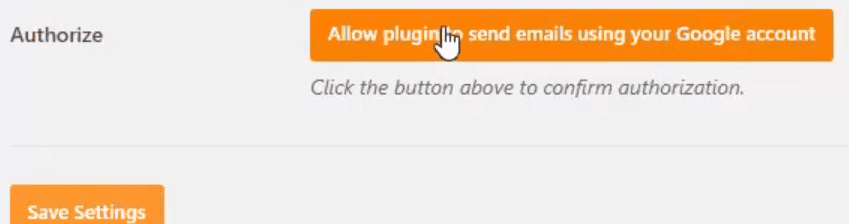
So once you click that you will see a screen asking you to authorize the website to use your email address. Please click Allow button in the pop-up screen.
Once you have done that you will see a success notification in WP Mail SMTP settings saying that the API project is now connected to our website and now you are all set up.
You can even send a test email to make sure everything works correctly.
Alternative method:
Now there’s a second method that you can use to set up the Gmail SMTP as the SMTP sender. This will allow you to manually connect your Gmail’s SMTP servers to send for your WordPress emails.
It is not as secure as the OAuth. So, we definitely recommend the OAuth. But it’s just another way that you can get through it if you need to.
To do that let’s head back over to WP Mail SMTP settings area and make sure you enter the From Email and your From Name correctly.
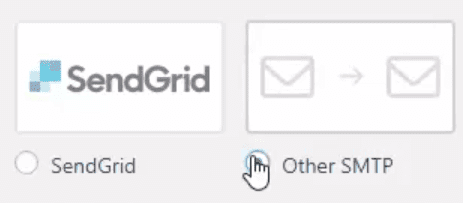
Under the Mailer section, instead of using the Google, you may want to select Other Smtp.
You may want to scroll down to our SMTP information.
And you will need to fill out the SMTP Host and SMTP Port information from Google. For the SMTP host, you need to set up smtp.gmail.com, and for the SMTP Port, use the port 465.
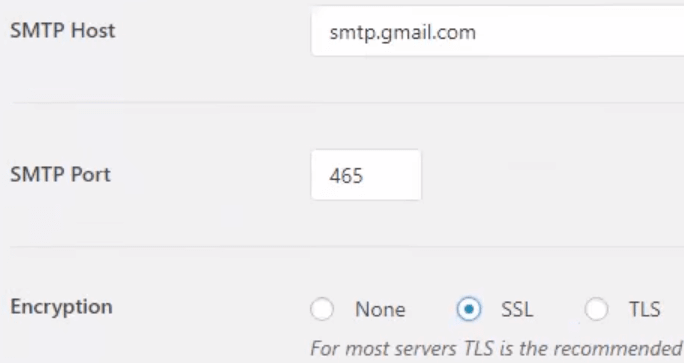
Next, to encryption, you may want to select the appropriate Encryption.
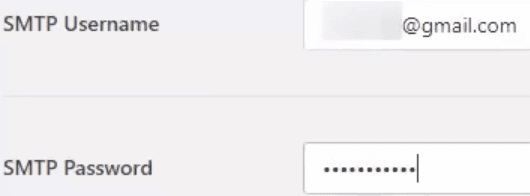
You want to keep the Authentication ON by default. For authentication, let’s turn that on and from here you will need to add your username and password.
SMTP Username:
This is your Gmail or this could be your Gsuite personalized domain name as well.
SMTP Password:
Set up the password that you use for your email account and click the Save Settings button.
Email Test:
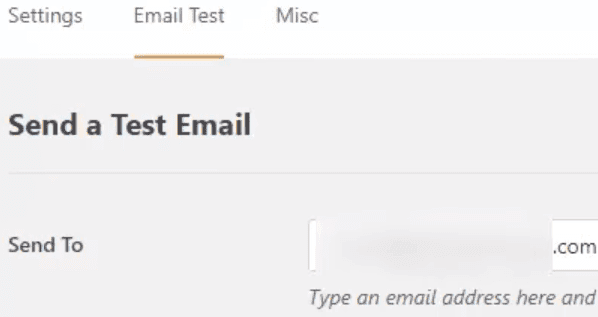
Here’s the deal, no matter which method you used above, you can always send a test email. To send a test email, you may want to go to WP Mail SMTP settings, click the Email Test tab which would be listed next to Settings tab as shown in the picture below.
In the Send To field, type in the email address you want to send your test email to and click Send button.
We are doing this just to make sure there was no problem.
And you can see once you send a test email, you will get a notification that it was sent successfully if you follow this tutorial step by step.
Conclusion
I do hope that this article helped out sorting out gmail smtp not working issue. However, if you are interested in SendGrid smtp which is another free SMTP provider, you might want to check out this WooCommerce not sending emails article.
If you are interested in knowing how I improved my website traffic from 3 per month to 500 per day, please click the subscribe button below, I would send you a free ebook on what steps we followed to improve our website traffic.
Also, Please feel free to stop by and say hello to us on our Facebook, Twitter or Pinterest page.
If you prefer to watch this tutorial through video, you might want to check out this link:
Want new articles before they get published? Subscribe to our Awesome Newsletter.